Frame of Fury Short AI Video (Dream Machine, MidJourney)
Couple weeks after my initial disappontment with LumaLabs Dream Machine, I've found a way to leverage its strong suits, especially since the company has introduced a new, much needed feature - keyframes. This is really a game-changer. Why? Well, text prompts are great but oftentimes for some reason crucial parts of them get ignored. You wite something like 'cracks appearing on the statue and light begins to shine through' and get a video where the statue grows hands. Random. With keyframes, the model has to work within the boundaries of the two ready-made visuals, all it has to do is connect them together, and while there can be some variation in how it's doing that, by and large it comes out very smart. And you can still use the text prompt for guiding the Machine through the process.
Frame of Fury
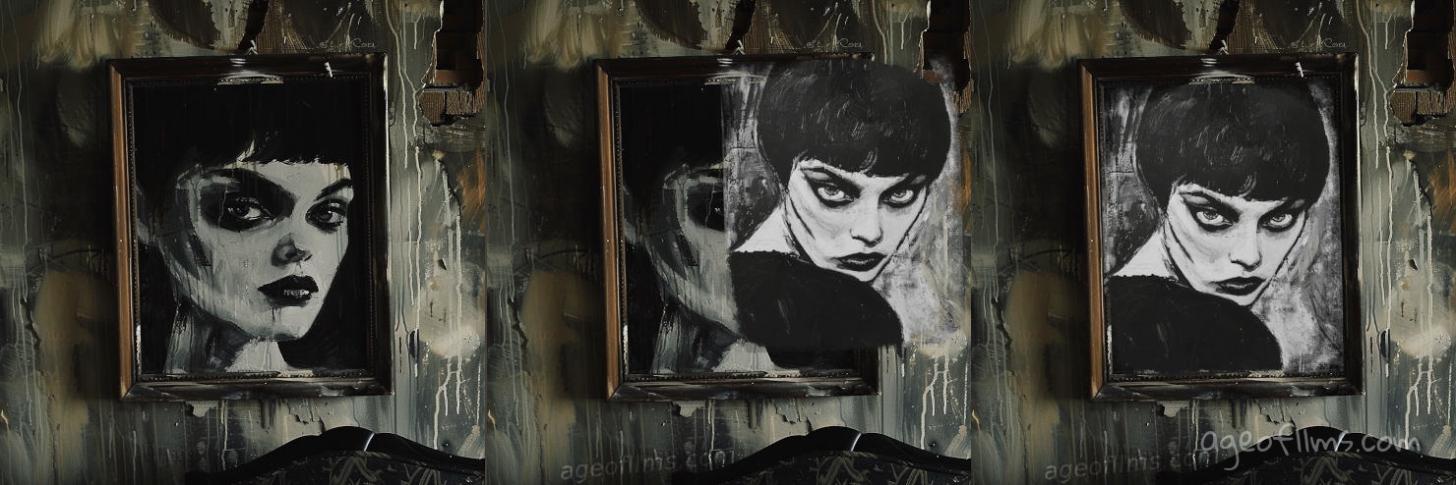
So here I'm introducing you to my latest AI video experiment, a scene from a scary movie, which could possibly have been called 'Frame of Fury or Portrait of Fury'? It's made with a bit of creativity, a lot of theme/character consistency, matching music and sound effects nicely timed with the character's actions.
Basic Necessities
If you'd like to create something similar, you'll need:
- MidJourney
- Dream Machine
- Elevenlabs (sound effects)
- Udio (background music)
- Photo/Video/Audio editor of your choice
Basically, for a single 5-10 seconds video morphing 2 images together, like this one below, you can stop at the 2nd step and just make yourself a nice short video with a sound effect.
But I wanted both a sound effect and some background music, and to connect a few of Dream Machine short videos together, I had to do a bit of extra work.
How I Made the Video
My process went like this.
-
Create the main character.
For this project, I've used the prompt:
German Expressionist Cinema style, short-haired woman looking intensely at me, over the shoulder.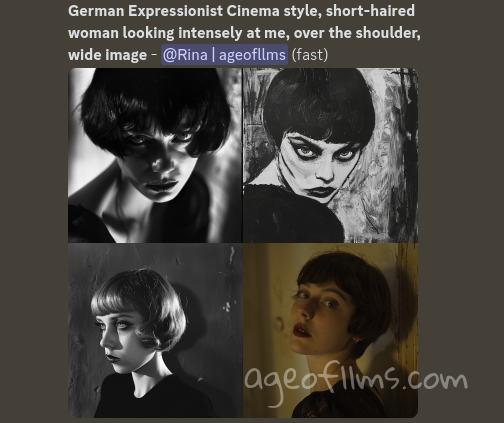
I've picked #2.
-
Introduce some change. Movement, action, appearance, environment change - whatever floats your boat and imagination. You need just 2 images for keyframes. Maintain character and/or style consistency through MidJourney's operators.
For example, I wanted the same woman to scream. So my prompt became:
Woman screams angrily, eyes closed, emotional --cref https://url-of-my-chosen-imageSee in MidJourney, you can generate multiple images of the same person using the operator --cref (charachter reference) followed by your image url.
Retrieving the Image URL from MidJourney: Head over to your MJ account, then open https://www.midjourney.com/archive where you'll find all the images you've ever created. Click on the image to open it in full size, then right-click it.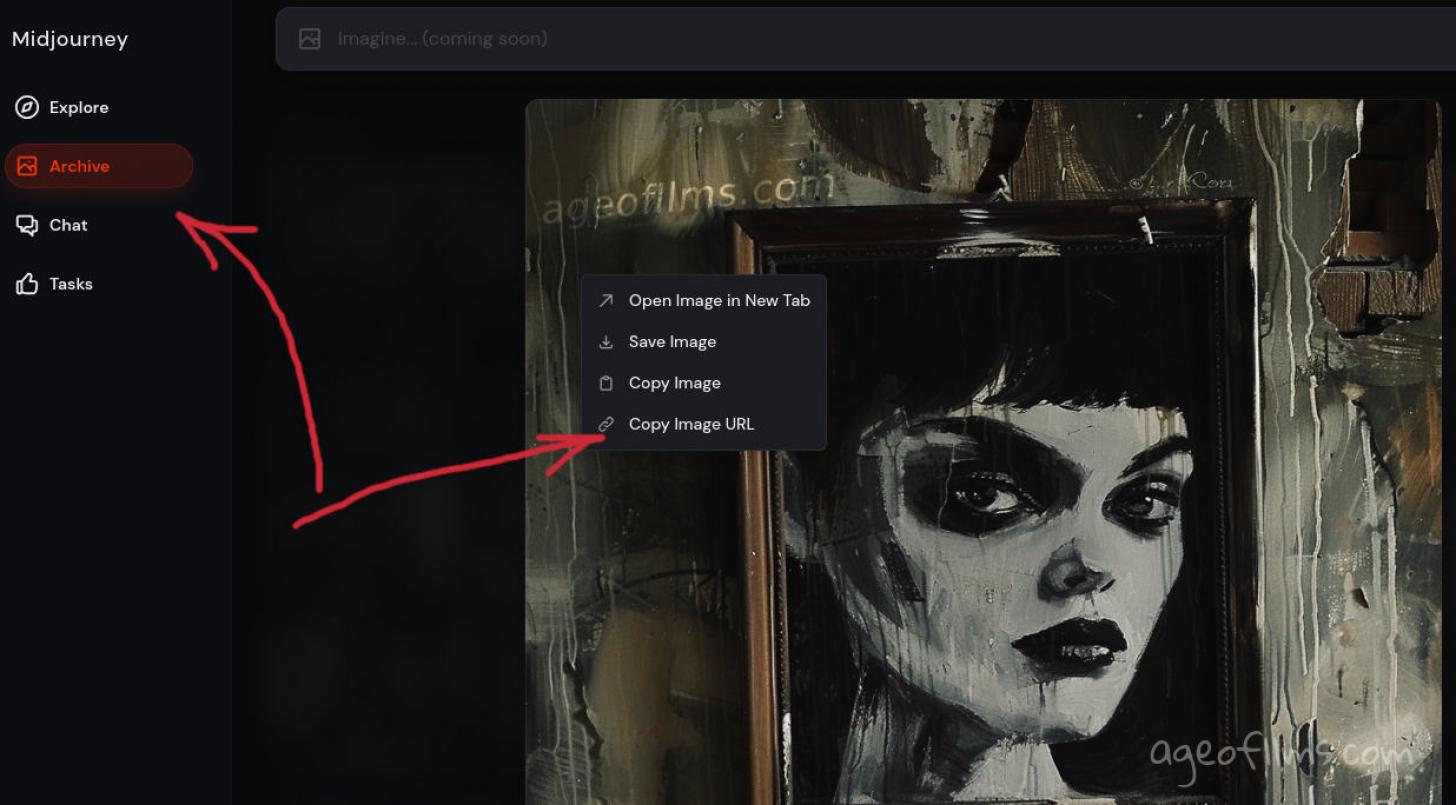
MJ copy image address This will give you an option to "Copy URL". Once you do, it will look likehttps://cdn.midjourney.com/filename.png.....When using character reference, I didn't need to describe the woman in details any more, so prompt is just "woman" and AI knows which one because it has the URL of her looks.
2a Match environment for consistency (if needed). For example, the idea of the door in the corridor came to me later and I wanted to make the interior similar to the one where my woman is furiously screaming. Again, I grab the URL of that picture and use it as style reference (--sref)
Eerie, chilling, an opening old door is seen at the end of the long corridor, minimal light --sref https://s.mj.run/OO4n6A16J4o -
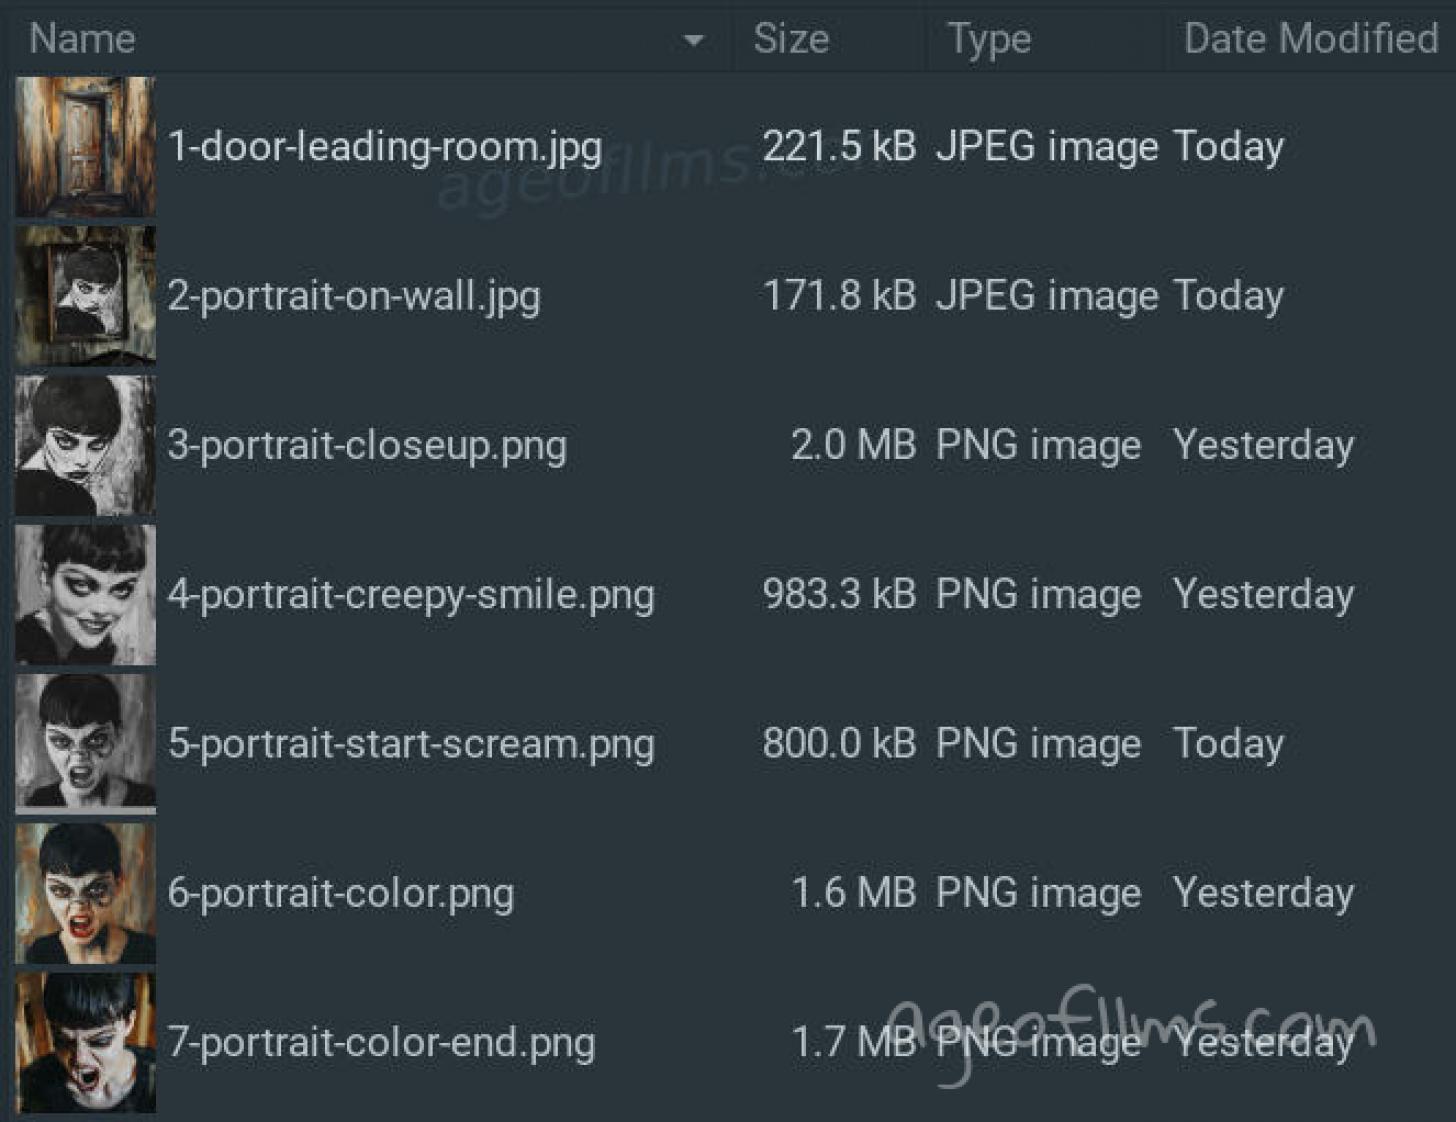
Organize your images as a sequence in a dedicated folder on your computer and name them accordingly. It helps to visually assess what image follows which well. I've started with two images and ended up with seven.
Images in Directory -
Plan Dream Machine Videos. Currently, on a free plan, you're allowed max 2 concurrent generations and with HQ pics as keyphrames that job is likely to take up to 15 hours! If you're on paid tier, that should be faster and easier. If not better get started on some of your videos right away while you keep working on more images for the future ones.
-
Roll the 'dreaming'.
Go to Luma's Dream Machine and upload your initial image.
Once you've uploaded your initial image, a new button will appear to the right of your uploaded photo. This button has a "+" button and text reading "End Frame (optional)". Upload End Frame: Click on the button to upload a second image that will serve as your end frame.
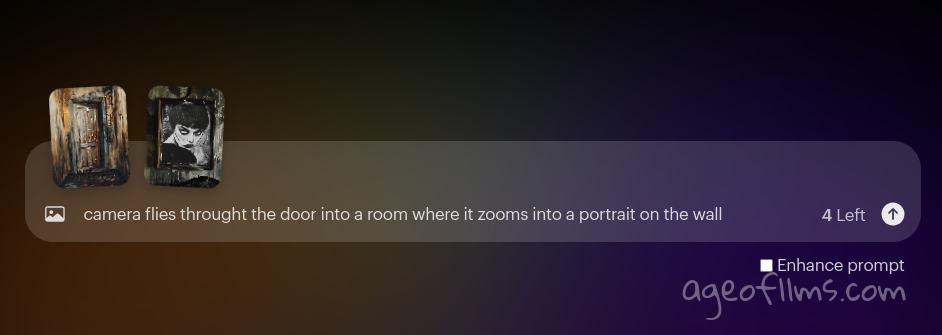
You can either leave the text box blank, or fill in with instructions on what you want the transition to do. These can be details about movement, transformation, color changes, and other effects. If you leave it blank do not uncheck the "Enhance prompt" box. I do when I give enough instructions in my prompt.
-
Connect short clips and add music
There's many ways to bake a cake, today there's lots of tools, including free online ones, that you can use to throw a few clips together. And likely some that'll allow you to add an audio, too. Just google 'free video merger online' etc. I'm not very familiar with them because I have my preferred apps on my PC that I'm comfortable working with.
I'm not saying I'm old, but I've played around with video/animation software back when Adobe Flash was still Macromedia Flash. So that only makes me ancient, I guess, lol.
I'm also a fan of opensource Linux software so I use Openshot and Avidemux for simpler jobs. Laugh all you want but at least i don't have to click 'I Accept' on some shady ass terms of service Adobe keeps rolling out. I've been using their Photoshop and Premiere many years ago but have since moved away to Gimp and Openshot and for my tasks they're quite enough. And free. Here I've actually swapped the portraits myself using Gimp:
Gimp Portrait Swap In Openshot, btw, added a Square 1024x1024 video profile for this project by creating a text file in a certain directory. Now it's on my down down list when I export the video. I value that I can customize my software to my needs.
But whatever you'll end up using, you usually have to think how best to seamlessly connect one clip with the next one. Well, is the last image of Clip 1 also the beginning of Clip 2? If not, you have to take those two images and create a dedicated clip with them, let Dream Machine transition one into the other for you.
For example, I thought a transition from the B&W poster style woman smiles > to a > colored cinematic style woman screams would be harder to do smoothly. So I've desaturated the colored image and that's how file 5-portrait-start-scream.png came about. Which I then went ahead and blended myself in the video editor, because it's quick and easy just blending colors. For my full length video, I've created a few more zoom and fade to/from black effects in Openshot Video Editor for smoother transitions, one such trick actually saved me needing another trip to Dream Machine.
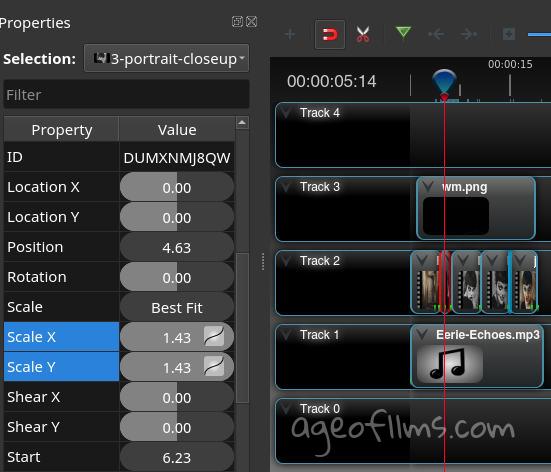
You can see that Openshot Video Editor has 3 Tracks, one of which is an mp3. That's AI generated background music from Udio. Very easy, fast, you can see my text prompt if you open that link.
The screaming sound has been generated by ElevenLabs, and I've interpolated it with the clip even earlier. This was my prompt btw.
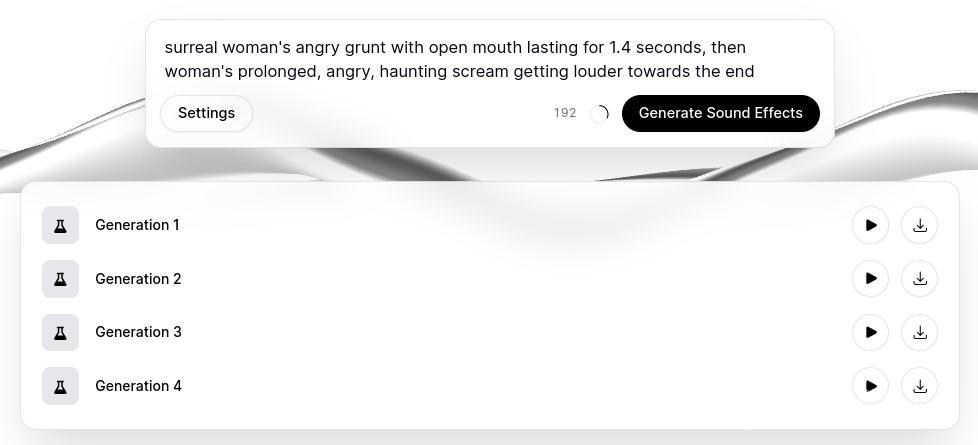
You see I've specified the length of the grunt vs scream, because the woman is not looking to be screaming straight away, she just has an open mouth, so I thought a grunt would be more appropriate. I've timed the seconds on my video clip and it was 1.4 sec. I'm impressed that the AI fully understood and respected that prompt. Of course, you can use this tool to narrate a story for you as well, not just grunts and screams!
AI Filmmaking: Bottom Line
Look, we're miles away from Hollywood movies production from text prompts, but maybe not as many miles as some think. With MidJourney's amazing features like character and style consistency, it's now feasible to portray a short story at least. With Dream Machine's awesome morphing techniques animating those characters becomes easy! These tools are going to empower a lot of people with creative streaks who stayed away from this sphere only because previous animation software was too intimidating and you had to learn a lot to master it. There is still stuff to learn but significantly less. Similarly to how YouTube revolutionized the media, this will change our entertainment industry as well. Love it or hate it, you can't stop this train, it's at full speed...
That's finally all for today, folks! Thanks for reading or scrolling down to this point! 🎯
Happy crafting your prompts and generating your short films!
Last modified 13 July 2024 at 13:47
Published: Jul 3, 2024 at 12:38 PM
Related Posts
AI Film Festival 2025: Submissions Open Now
12 Feb 2025

AutoVFX AI: Text-Driven VFX Creator
13 Nov 2024